Sunday, 21 June 2015

Connecting Non-standard Controller to a PC

Today I'm going to show you how to connect a non-standard controller to a PC. The PC allows for many different types of controller to be connected. From racing wheels to fighting sticks, traditional game-pads to flight sticks. In this case I'll be connecting a flight stick and playing Microsoft Flight Simulator.
To do this you'll need an analogue flight stick. Unlike fighting sticks, the flight stick is an analogue controller. So the controller senses more than just "Up" or "Not up". It can measure how far the user is pushing up, making it far more suitable for flight simulators. I'm using a Logic3 flight stick.
This and a lot of other modern flight sticks are connected using a built-in USB cable. This is the standard for controller connectivity to PC.
Plug the USB into the USB port.
This notification should appear telling you that the Computer has found the new hardware. In this case it has also installed properly.
To configure the controls to your liking, you can go to the control panel in Windows and click "game controllers".
This window should pop-up allowing you to pick which controller you want to configure.
This is a good opportunity to make sure all the inputs are working correctly. Digital and analogue.
This is what it should look like if you're pressing one of the digital keys on the Logic3 flight stick.
Microsoft Flight Simulator is already on this PC, so I just need to click the shortcut I have on the desktop.
Now you can enjoy flight simulators with a flight stick!
You can also set up fight-sticks for fighting games, racing wheels for racing games or a traditional control pad for nearly any game.

Setting up Graphics Drivers

Today I'm going to be showing you how to set-up graphics drivers for your Graphics Card. In this case I'm using an AMD driver for the built-in AMD GPU in this Laptop.
You can install a graphics driver in a number of ways. You can download it straight from the internet, copy from a USB or install it using the disc that comes with the Graphics Card. Using the internet would give you the most up-to-date drivers, but in this case I'm using a USB stick to transfer the data.
Plug the USB stick into the Laptop or Desktop USB port.
In most PC's a prompt will appear that will allow you to access the raw files on the USB by clicking "Open folder to view files". However if this doesn't appear you can find your USB drive in the My Computer folder.
Find the EXE for the graphics drivers. Clicking this will begin the process of installation.
If you don't already have drivers of some kind this pop-up may appear. Click yes.
The EXE file should now being unpacking the files necessary for installation.
Select the appropriate language and click next.
ATI Technologies wants to create its own folder in Program Files. Click yes.
After all the files and folders have been made on your system, this prompt should appear giving you the options for installation. In this case we are installing for the first time, so click Install at the top.
Updating would just update an already installed driver and uninstall would wipe the entire driver from your PC.
Users will now get the option to use express installation or custom installation. In this case we're going to choose express installation for ease. Custom will allow more adept computer users to tune the software how they see fit and enable and disable certain options.
The rest of the process is mostly automatic. You should be ready to play video games soon.

Setting Up A Lan Game

Today I'm going to be demonstrating how to set up a PC and a LAN network. LAN is an acronym for Local Area Network. It allows multiple users to connect and play games. This LAN network will be configured using Ethernet cables for the best performance. Wireless LAN networks are often more convenient, but the latency on these networks can make competitive gaming difficult.
First you'll need an appropriate system. Modern PlayStation 4 and Xbox One consoles aren't able to do LAN parties, so you're left with previous generation consoles or computers to have a LAN party with. Today I'm using a DELL laptop because it's more convenient to move to another location than a desktop PC.
For extended play-sessions it would be a good idea to bring the power cable that should come with the laptop.
Plug it into the mains.
And the other side into the Laptop.
This is the Ethernet cable I'll be using to connect the computer to the Switch.
This is a switch. It's used to either connect many computers together using Ethernet cables, or connecting multiple computers to a modem. This is what we'll be using instead of a Wi-Fi signal. Plug one end of the Ethernet cable into the Switch (It doesn't matter which end, it's reversible).
Plug the other end into the computer. The socket should look like this.
Find the appropriate control system. For PC this is generally the mouse and keyboard, but for consoles it may be the control pad that comes with the system. As I'm using a laptop, the keyboard is already built-in to the system.
If you're using a modern mouse, it will probably fit into a USB slot like this one.
You should have all the appropriate attachments and cables ready. So boot-up the computer.
There are multiple ways of getting a game on your system. Some games come on disc, some are download only, today I'm using my USB stick to transfer the shareware Command and Conquer game to this laptop.
Slot it into the appropriate USB port.
On most PC's this pop-up will appear allowing you to go straight into the files on the attached drive. Click on "Open folder to view files" to view the raw files. If this pop-up doesn't appear, you can always go into My Computer and look for the USB drive in there.
In my case the game is kept in a ZIP folder, so right clicking and clicking extract is necessary to get the game running. This pop-up should appear allowing you to place the game where you want on the computer.

After this is done you can find the ra95-spawn file in the folder you have extracted. This should boot the game up. In many cases though, this will just start the installation process. This process doesn't take very long and is a lot like the folder extraction process. The user just needs to tell the installer where to place the file on the system and then click go.
Here's the first menu that the user will see when opening the game. For some reason mine isn't where it's supposed to be and is smaller than it should be, but the menu is still functional. To begin a LAN game, click the Multiplayer tab.
A new menu will pop-up giving you a new set of options, for a LAN game, click Network.
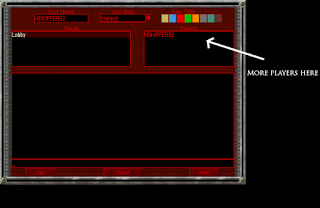
Now you'll be able to select a map and game mode and play the game! New players will join in the box on the top right.

Sunday, 7 June 2015

Setting up a non-standard controller

Today I'm going to be configuring the PlayStation Move controller for the PlayStation 3 slim. This controller can be used with older PlayStation 3 models or the newer PlayStation 4 console, but you'll need a PlayStation 4 camera instead of the PlayStation Eye.
Make sure you've got a USB to a mini-USB. This should come with the PlayStation Move controller.
You should also make sure you have the PlayStation Eye camera if you're connecting to a PlayStation 3 system. This camera, like many PlayStation 3 peripherals, has a built-in USB cable. At this point USB is the standard for most devices that need to be connected to each-other. This is good because it means many devices are already equipped with the appropriate sockets.
Turn on the PlayStation 3.

Plug the Eye camera USB into the PlayStation 3. Only the front of the PlayStation 3 actually has a set of USB ports.
The PlayStation Eye camera should be on now. You can tell by the blue or red light on the front.
Go to accessory settings in the settings and find "Camera Device Settings" to make sure the correct camera is selected. However this should have already happened as automatically.

Now plug the standard USB end of the PlayStation Move USB cable.
And the mini-USB end in the PlayStation Move controller itself.
To activate the PlayStation Move controller, pressed the PlayStation Button at the center of the controller. This is a similar button to the one on the Duelshock 3 that activates the controller. This will also link the controller with this specific PlayStation, so in the future pressing the PlayStation button will also turn on the console.
In the same menu we found the Camera Settings in, find Calibrate Motion Controller. This will ready the PlayStation Move for use with the camera.

In calibration you will need to aim the PlayStation Move controller at the PlayStation Eye, and then at certain points on the TV screen. This will let the PlayStation 3 know where these points are relative to each other to better judge where the PlayStation Move is being pointed.
Insert a PlayStation Move game or Move compatible game. Or select a downloaded game from the games menu.
Highlight the game and press to move button to play!